
Satin stitch is one of the most important stitch types used in Embroidery Digitizing. It creates smooth, dense, and attractive embroidered areas that can make letters, borders, outlines, and small shapes look clean and professional. When used correctly, satin stitch gives embroidery a polished appearance while maintaining good fabric coverage.
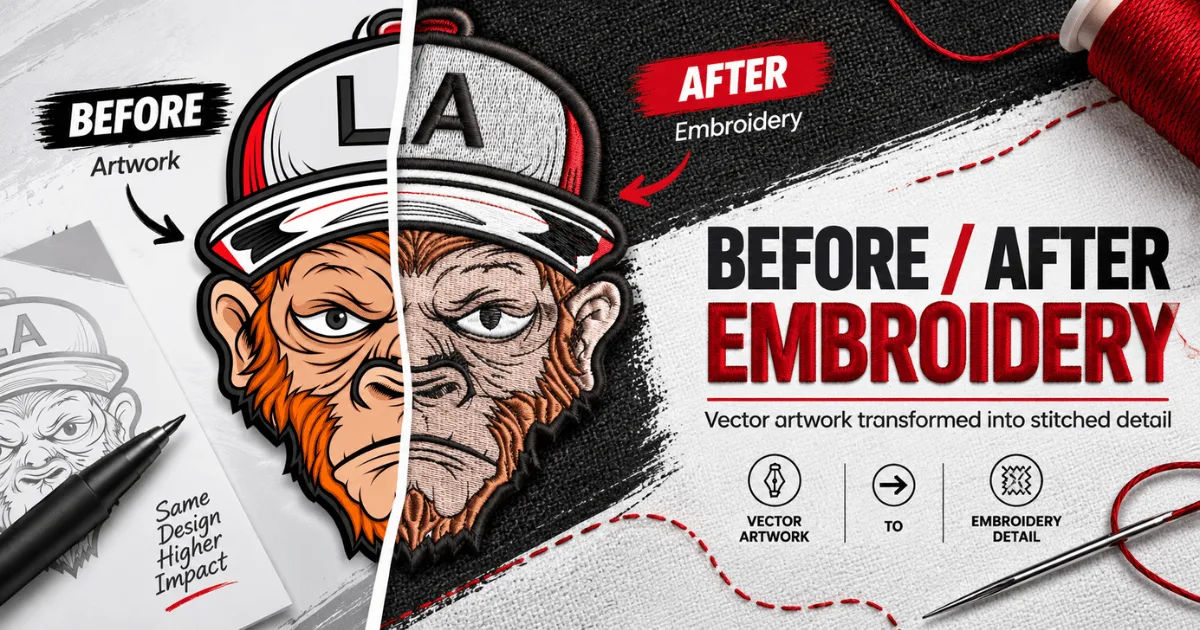
Understanding how satin stitch works is important for anyone involved in logo embroidery, garment decoration, patches, monogramming, or custom embroidery. The digitizer must decide where satin stitches should be used, how wide they should be, what direction they should follow, and how densely they should be placed.
This guide explains how satin stitch is used in embroidery digitizing, where it works best, what factors affect its quality, and how professional digitizers create better embroidery results.
What Is a Satin Stitch?
A satin stitch is made from closely placed embroidery stitches that run from one side of a shape to the other. The stitches are generally longer than the individual stitches used in a fill stitch, creating a smooth and slightly shiny surface.
The name comes from its appearance. When properly digitized, the stitches can reflect light in a similar way to satin fabric.
Satin stitch is especially useful for narrow or moderately sized areas. It can cover these areas with a smooth layer of thread without producing the rough texture commonly associated with some fill stitches.
In Embroidery Digitizing, satin stitch is commonly used for lettering, outlines, borders, narrow columns, and detailed design elements.
Why Is Satin Stitch Important in Embroidery?
Satin stitch provides several advantages. Its smooth appearance can make an embroidered design look more refined and professional.
It also works particularly well for text. Small and medium-sized lettering can become much easier to read when the stitches are properly placed.
Another advantage is its flexibility. A digitizer can adjust stitch direction, density, width, and underlay to control the final appearance.
However, satin stitch is not suitable for every shape. Very large areas may become too dense or cause problems with thread tension and fabric stability. Professional Embroidery Digitizing requires choosing the correct stitch type for each part of a design.
Common Uses of Satin Stitch
Lettering and Monograms
Lettering is one of the most common applications of satin stitch.
Names, initials, business names, and decorative text can often benefit from satin stitching. The smooth surface helps create clear letter shapes and gives text a professional finish.
For monograms, satin stitch can provide the bold and elegant appearance that customers often expect.
The digitizer must consider the size of each letter. If a letter is extremely small, long satin stitches may not work properly. In such cases, the design may need to be simplified or digitized with another stitch type.
Borders and Outlines
Satin stitch is also frequently used for borders and outlines.
A satin border can define the edges of a logo or design and create stronger visual separation between different elements.
The width of the border must be carefully controlled. If it is too narrow, the embroidery may not provide enough coverage. If it is too wide, the design may look heavy.
Small Shapes
Narrow leaves, decorative lines, curved shapes, and other small design elements can often be created effectively with satin stitch.
The shape should be suitable for the stitch width. Satin stitch performs best when stitches can travel across the shape consistently.
Logo Details
Business logos often contain narrow elements that need strong definition. Satin stitch can be used for these areas to create crisp edges and a clean finish.
During Embroidery Digitizing, the digitizer may combine satin stitch with fill stitches and running stitches. Using several stitch types allows each part of the logo to receive the most appropriate treatment.
How Satin Stitch Is Created in Embroidery Digitizing
Creating a good satin stitch is more than simply selecting a stitch setting in digitizing software.
The digitizer first studies the artwork. They identify the areas that are suitable for satin stitching and determine the approximate width of each section.
Next, stitch direction is established.
The direction determines how the thread crosses the shape. Changing the direction can affect both the appearance and stability of the embroidery.
After that, the digitizer determines the stitch density. Density controls how closely the stitches are placed together.
The design is then reviewed for potential problems such as excessive density, long stitches, unnecessary jumps, or poor connections.
Finally, the design should be tested on the intended fabric whenever possible.
Understanding Satin Stitch Width
Width is one of the most important factors in satin stitch.
A satin column that is too narrow may not produce consistent coverage. It may also become difficult for the embroidery machine to sew accurately.
A very wide satin area can create other problems. Long stitches may become loose, snag easily, or fail to provide the desired structure.
Because of this, professional digitizers pay close attention to the width of every satin element.
In Embroidery Digitizing, width decisions should be based on the design, fabric, thread, machine, and final embroidery size.
The Role of Stitch Density
Stitch density refers to how closely stitches are placed together.
Higher density means more stitches are packed into an area. Lower density leaves more space between individual stitches.
Too little density can produce weak coverage and allow the background fabric to show through.
Too much density can make the embroidery stiff and heavy. It can also increase thread consumption and potentially cause puckering.
A skilled digitizer chooses a density that provides good coverage without unnecessarily loading the fabric with thread.
Density should not be treated as a single setting for an entire design. Different materials and design elements may require different approaches.
Why Stitch Direction Matters
Stitch direction strongly affects the appearance of satin embroidery.
If all elements use the same direction, the design may look flat or visually confusing. Changing the direction can help distinguish different sections.
Curved shapes require especially careful planning. The stitches should follow the shape naturally instead of creating awkward angles.
For example, a curved border may need gradual changes in stitch direction to maintain a smooth appearance.
Good stitch direction is an important part of professional Embroidery Digitizing because it affects both visual quality and sewing performance.
Satin Stitch and Underlay
Underlay is placed beneath the visible embroidery stitches.
Its purpose is to stabilize the fabric, support the top stitches, and improve coverage. Without suitable underlay, satin stitches may sink into soft materials or fail to maintain their intended shape.
Different fabrics require different underlay approaches.
Lightweight fabrics may need stronger stabilization, while dense fabrics may require a different structure.
The digitizer must balance the underlay carefully. Too little support can reduce quality, while excessive underlay can increase bulk.
Satin Stitch on Different Fabrics
Satin stitch behaves differently depending on the fabric.
On cotton, a properly digitized design can produce clean and attractive results. However, the fabric may still require suitable stabilization depending on its weight.
Stretch fabrics require additional attention because they can move during stitching. Without proper support, satin columns may become distorted.
On jackets, caps, denim, and workwear, the digitizer may need to adjust density and underlay to accommodate the heavier material.
This is why successful Embroidery Digitizing cannot depend entirely on artwork. The production fabric is equally important.
Satin Stitch for Cap Embroidery
Caps create special challenges because their curved surfaces can affect stitch placement.
Satin stitch is often used for cap lettering and narrow logo elements. However, the digitizer must consider the direction in which the cap will be stitched.
Stitches should be planned to reduce unnecessary distortion.
The design may also need to be simplified because small details can become difficult to reproduce on curved surfaces.
Professional digitizing for caps requires experience with both stitch behavior and machine limitations.
Common Satin Stitch Problems
Uneven Stitch Coverage
Uneven coverage can occur when stitch spacing or stitch direction is poorly controlled.
Some sections may look darker or lighter than others.
This problem can often be reduced by adjusting stitch density, width, or the shape of the embroidery object.
Excessive Thread Density
Too many stitches can create unnecessary bulk.
Heavy density may cause puckering, stiffness, thread breaks, or fabric damage.
A good digitizer avoids adding stitches simply to make an area appear more solid.
Long Satin Stitches
Very long stitches can become loose and vulnerable to snagging.
They may also fail to sit properly on the fabric.
Breaking a large area into suitable sections or changing the stitch structure can help solve this problem.
Jagged Edges
Poorly planned satin columns can produce rough or uneven edges.
This may happen when the artwork contains complex curves or when stitch placement does not follow the shape correctly.
Careful node placement and stitch planning are important for producing smooth edges.
Puckering
Puckering happens when the fabric pulls or gathers around the embroidery.
It can result from excessive density, insufficient stabilization, unsuitable underlay, or incorrect tension.
During Embroidery Digitizing, the digitizer should consider fabric behavior before finalizing the stitch structure.
Satin Stitch vs. Fill Stitch
Satin stitch and fill stitch have different purposes.
Satin stitch is generally better for narrow areas, lettering, borders, and defined columns.
Fill stitch is more suitable for covering larger areas.
For example, a large company logo might use fill stitches for its main background while using satin stitch around the edges and for smaller lettering.
Using the right combination can improve both appearance and efficiency.
A professional Embroidery Digitizing file often contains several stitch types rather than relying on one technique for every element.
Satin Stitch vs. Running Stitch
Running stitch uses individual lines of stitching to create outlines, fine details, or delicate designs.
It consumes less thread than a dense satin area and can work well for very thin elements.
Satin stitch provides greater coverage and a stronger visual presence.
The choice depends on the width and purpose of the design element.
How to Improve Satin Stitch Quality
Use Appropriate Stitch Length
Stitch length should be appropriate for the design and fabric.
Extremely short stitches can increase stitch count without necessarily improving quality. Extremely long stitches can become unstable.
A balanced stitch length helps create smooth coverage.
Adjust Density Carefully
Avoid using maximum density simply because it creates a darker appearance on screen.
The embroidery machine and fabric have physical limitations.
A properly balanced density usually creates a cleaner result and reduces unnecessary thread usage.
Plan Entry and Exit Points
Entry and exit points determine where stitching begins and ends.
Poor placement can create visible bumps, unwanted jumps, or weak connections between elements.
Careful planning helps keep the design efficient and clean.
Use Appropriate Underlay
Underlay should support the top stitches without creating excessive thickness.
The correct structure depends on fabric type, design size, and embroidery application.
Test the Design
A digital preview cannot always reveal how an embroidery file will behave on actual fabric.
Test stitching can expose issues such as puckering, gaps, distortion, excessive density, or thread breaks.
Testing is especially important for complicated designs and commercial production.
The Importance of Artwork Preparation
The quality of the original artwork can influence the digitizing process.
Low-resolution images, blurry edges, and complicated details may make it difficult to determine the intended shapes.
Before beginning Embroidery Digitizing, artwork may need to be cleaned, simplified, or recreated as vector artwork.
A digitizer should identify which details are important and which can be removed without affecting the overall design.
Embroidery has physical limitations that do not exist in ordinary digital graphics.
Choosing the Right Thread
Thread selection can also influence satin stitch results.
Polyester thread is widely used because of its durability and resistance to many forms of wear. Rayon thread is known for its smooth appearance and shine.
The appropriate choice depends on the application and required finish.
Thread weight also matters. Different thread sizes affect stitch appearance, density, and the level of detail that can be achieved.
Satin Stitch for Professional Logos
Businesses frequently use embroidered logos on uniforms, jackets, caps, shirts, bags, and promotional products.
Satin stitch can make logo lettering and borders stand out clearly.
However, logos should be digitized according to their final production size.
A design intended for a large jacket back cannot always be reduced directly to a small left-chest logo.
When the size changes, stitch width, density, underlay, and details may need to be adjusted.
This is an important principle of professional Embroidery Digitizing.
How Digitizers Balance Quality and Stitch Count
Stitch count affects production time and thread consumption.
A design with unnecessarily high stitch count can take longer to sew and may place excessive stress on the fabric.
However, reducing stitches too aggressively can damage the appearance of the design.
The goal is not simply to create the lowest possible stitch count. The goal is to create the best embroidery result using an efficient stitch structure.
Experienced digitizers make these decisions based on the artwork, fabric, machine, and intended use.
Final Quality Check
Before an embroidery file is delivered for production, it should be reviewed carefully.
The digitizer should check stitch direction, density, underlay, object sequencing, trims, jumps, overlaps, and color changes.
The design should also be examined at its actual production size.
A file can look excellent when viewed on a large computer screen but perform poorly when embroidered at a much smaller size.
A final sew-out provides the most reliable confirmation.
Conclusion
Satin stitch is a fundamental technique in professional Embroidery Digitizing. It is particularly valuable for lettering, monograms, borders, narrow shapes, and detailed logo elements where smooth coverage and strong definition are required.
Its quality depends on much more than selecting a satin stitch option in digitizing software. Width, density, stitch direction, underlay, entry and exit points, thread selection, fabric type, and embroidery size all influence the final result.
Satin stitch is also not a universal solution. Large areas are generally better handled with fill stitches, while extremely fine details may require running stitches or other techniques. The strongest embroidery designs use different stitch types strategically.
A skilled digitizer understands the physical behavior of thread and fabric and translates artwork into a stitch sequence that an embroidery machine can reproduce accurately. Testing the design on the actual material is another important step because real fabric can behave differently from a digital preview.
When satin stitch is planned correctly, it can give embroidery a smooth, bold, and professional appearance. Whether the project involves corporate logos, personalized garments, caps, patches, uniforms, or decorative embroidery, proper satin stitch planning can make a significant difference.
Ultimately, successful Embroidery Digitizing combines artistic judgment with technical knowledge. By controlling stitch width, density, direction, underlay, and sequencing, digitizers can create embroidery that is attractive, durable, readable, and suitable for real-world production.